Downlights can create a warm, focused atmosphere, but poorly planned systems often waste electricity above our heads. How to reduce energy consumption with downlights begins with better design, not simply fewer fittings. The International Energy Agency reports that lighting uses about 15% of global electricity. The U.S. Department of Energy also states that LED products use at least 75% less energy than incandescent lamps. These figures show why small ceiling choices matter across homes, shops, hotels, and offices.
Lighting researcher Dr. Mariana Figueiro describes light as “not just illumination, but also a biological stimulus.” Her point supports a practical lesson: brightness, colour, timing, and direction must work together. A 7-watt LED downlight can still waste energy when it lights an empty corridor or reflects harshly from a white wall. Occupancy sensors, dimming controls, efficient drivers, and suitable beam angles can prevent that waste. Energy Star guidance similarly recommends certified products, proper sizing, and controls for better lighting performance.
This guide presents ten realistic methods for reducing downlight consumption. It covers lumen selection, spacing, controls, maintenance, colour temperature, and smart scheduling. Some recommendations may seem obvious. They are often ignored during renovations. A smaller lamp is not always better if users compensate by installing more fittings. That mistake deserves attention. Actual savings depend on operating hours, room surfaces, driver quality, and user habits. Therefore, the best solution should be measured after installation, rather than assumed from packaging claims.
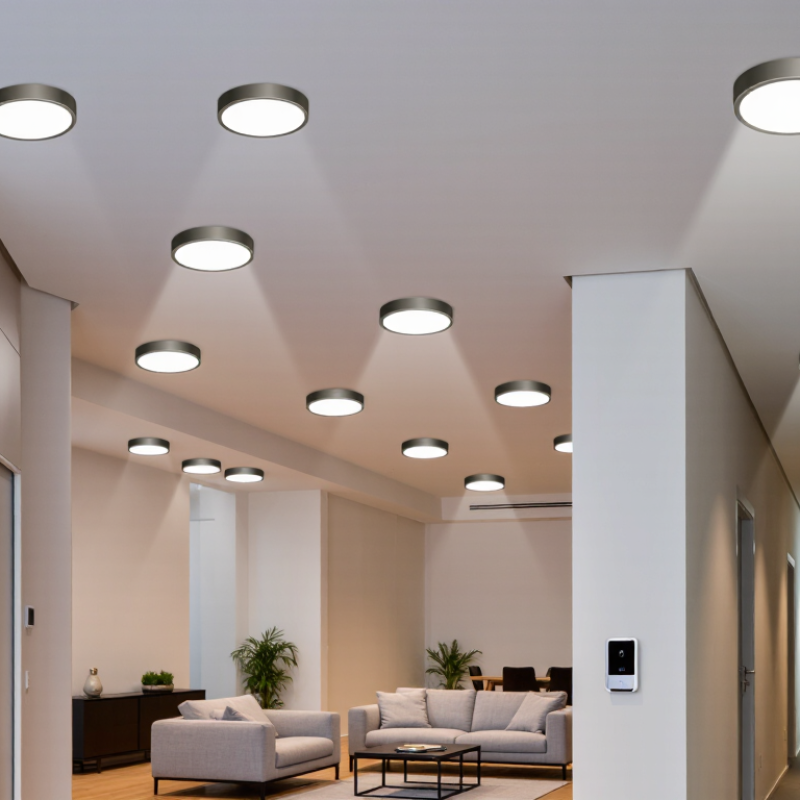
Efficient downlights produce useful light with less electricity. The key measure is lumens per watt, not wattage alone. A well-designed LED unit can deliver bright, even illumination while using relatively little power. Its optical lens also matters. Good optics direct light onto work surfaces instead of wasting it inside the ceiling cavity.
Heat control supports efficiency over time. LEDs lose performance when trapped in poorly ventilated fittings. An aluminium heat sink can move heat away from sensitive components. Stable drivers also reduce flicker and avoid unnecessary electrical losses. Check the technical sheet for efficacy, power factor, lifetime testing, and dimmer compatibility. These details are more reliable than vague claims on packaging.
Controls can reduce consumption further. Occupancy sensors switch lights off in empty rooms. Dimmers lower output near windows or during evening use. I have found that a slightly warmer color temperature often feels comfortable at lower brightness. However, personal preference can lead to over-lighting. Measure the room before installing multiple fittings. Spacing lights too closely wastes energy and creates harsh pools of brightness.
Maintenance is simple but important. Dust on trims and lenses gradually reduces usable light. Clean them carefully during routine inspections. A cheaper fitting may appear efficient, yet early driver failure can increase replacement waste and cost. I once underestimated this issue in a small renovation. The lights worked, but the layout needed more fixtures than expected.
Choosing a low-consumption downlight starts with lumens, not wattage. The U.S. Department of Energy reports that LEDs use at least 75% less energy than incandescent lighting and last up to 25 times longer. The IEA estimates lighting consumes about 10% of global electricity.
Tip 1: compare delivered lumens and efficacy, using 90 lm/W as a practical screening point.
Tip 2: choose only the output needed for the task.
Tip 3: check full-load wattage, including the driver. A low wattage label can hide poor performance.
Tip 4: select 2700–3000 K for bedrooms and 3500–4000 K for work areas.
Tip 5: choose CRI 90 or higher for artwork, food, and skin tones.
Tip 6: confirm dimmer compatibility before purchase. Dimmable does not mean universally compatible.
Tip 7: inspect beam angle. A 36-degree beam creates focused pools, while wider beams can soften harsh shadows.
Tip 8: look for low-flicker performance, thermal protection, and a replaceable driver. Testing information is sometimes missing. That deserves caution.
Tip 9: add occupancy or daylight controls near windows and in corridors.
Tip 10: review the photometric file, rated life, warranty, and safety certification.
DOE guidance focuses on whole-fixture performance, not chip claims alone. In real lighting plans, poor spacing can waste more energy than expected. Extra fixtures may remain dimmed for most of the evening. Recheck the layout at night. Fewer fittings might work, but visual comfort still matters.
Positioning downlights well can reduce energy consumption while making a room feel brighter. The goal is not to install more fittings. It is to place fewer lights where people actually need them.
For general coverage, keep downlights about 60 to 90 centimetres from walls. This reduces dark edges and helps spread light across the floor. In a living room, space fittings evenly rather than creating a tight central cluster. A typical ceiling may need 1.2 to 1.8 metres between lights, but ceiling height and beam angle matter. Wider beams suit open areas, while narrower beams can highlight a reading chair or artwork. Aim for layers. Use focused light over work surfaces, then softer lighting around seating areas. I have found that kitchen counters often need more useful light than the room centre.
Avoid placing a downlight directly above a television or mirror. Reflections and glare can make the space uncomfortable. In kitchens, position lights slightly in front of wall cabinets, so your body does not cast shadows across the bench. Bathrooms need careful spacing around mirrors and water areas, with fittings selected and installed according to local safety requirements.
Dimmers help. They also expose poor planning. If every light must run at full power, the layout may be doing too little. Daylight should influence the circuit design; lights near windows can operate separately from darker corners. Test positions with temporary lamps or marked ceiling points before cutting. Small changes matter, although my first layout was still too bright near the doorway.
How to Control Downlights With Smart Features
Tip 1: Use occupancy sensors and schedules together. A sensor turns downlights off after the room is empty. A schedule prevents unnecessary lighting before sunrise or after bedtime. The U.S. Department of Energy reports that LED lighting uses at least 75% less energy than incandescent lighting. Smart control makes those savings easier to maintain. In real homes, the largest waste often comes from forgotten lights, not bright LEDs.
Tip 2: Add dimming and daylight control. Near a window, downlights may need only 30% brightness. In a hallway, 20% may be enough at night. The International Energy Agency identifies lighting as a major electricity-use area worldwide, so small adjustments can matter across many rooms. However, dimmers must match the driver and downlight. Flicker is a warning sign. I have seen poorly matched controls create buzzing, uneven light, and frustrated users.
Tip 3: Create practical scenes, not complicated ones. Try “Evening,” “Cleaning,” and “Night Path.” Link each scene to a wall switch, app, or voice command. According to the U.S. Department of Energy, advanced lighting controls can reduce lighting energy use substantially, although results depend on occupancy and settings. Keep manual control available. Automation sometimes fails. A sensor can miss someone sitting quietly. Test the timeout, brightness, and recovery after a power cut. Review the system monthly, because household habits change.
How to control downlights with smart features
This illustrative calculation assumes 10 downlights operating 4 hours per day for 30 days. It compares a 50 W halogen downlight with an 8 W LED downlight and smart controls. Occupancy-based control is modeled as a 25% runtime reduction, while dimming is modeled as a further 30% reduction in electricity use.
Practical tips include switching to LEDs, using occupancy sensors, scheduling lights, adding daylight sensors, dimming when full brightness is unnecessary, zoning fixtures, turning off empty rooms, using timers, selecting efficient drivers, and monitoring consumption through a smart lighting system.
Downlights often look effortless, yet maintenance affects safety and electricity use. Before cleaning, switch off the circuit and let each fitting cool completely. Remove dust from the trim with a dry microfiber cloth. Never spray cleaner into the housing. For recessed fixtures, check insulation clearance and ventilation openings during routine inspections. A blocked fitting can trap heat and shorten lamp life. Look for flickering, discoloration, loose trims, or unusual warmth. These signs deserve attention from a qualified electrician, especially near bathrooms or kitchens. Small checks prevent larger faults.
Track energy use with a simple monthly record. Write down each fitting’s wattage, quantity, and average daily hours. Multiply them: watts × hours × days ÷ 1,000 gives approximate kilowatt-hours. Compare this figure with a plug-in meter or whole-home monitor when possible. Measurements are more trustworthy than memory. Motion sensors and timers can reduce waste in hallways, storage rooms, and empty guest areas. However, sensors need sensible settings. A light switching on every few seconds may consume more than expected. Check dimmers for compatibility, because buzzing or heat can indicate a poor match.
A practical lesson is that maintenance schedules often fail when they become too ambitious. A quarterly visual check is easier to maintain than a complicated calendar. Record the date, problem, and action beside the electrical panel or in a digital log. Do not replace one failed lamp blindly. The fitting, driver, switch, or wiring may be responsible. Energy readings can mislead during holidays, renovations, or unusually dark weeks. Note these conditions before judging performance. Review the log after several months, then adjust operating hours, cleaning intervals, or professional inspections based on evidence.
The figures below are practical planning estimates for one downlight unless otherwise stated. Actual results depend on operating hours, dimming levels, light output requirements, electricity rates, and installation conditions.
| Tip | Energy-Saving Action | Typical Baseline | Recommended Practice | Estimated Annual Energy Impact | Maintenance and Tracking Method | Safety or Performance Check |
|---|---|---|---|---|---|---|
| 1 | Replace inefficient lamps with LED downlights | 50 W halogen lamp used for 4 hours per day | Use an 8 W LED downlight with comparable light output and suitable color temperature | About 61.3 kWh saved per fixture each year | Record the rated wattage and compare annual operating hours with electricity-meter data | Confirm the LED is compatible with the fitting, dimmer, ventilation space, and required light level |
| 2 | Install occupancy or vacancy sensors | Light operates 4 hours per day in a room that is occupied intermittently | Use a sensor to reduce operating time by an estimated 30% | About 3.5 kWh saved per 8 W fixture each year | Compare sensor runtime with a one-week manual observation before and after installation | Adjust time-out settings to prevent frequent switching and nuisance shutoff |
| 3 | Use daylight sensors near windows and skylights | Downlights remain on during daylight hours | Dim or switch off the lighting when measured daylight is sufficient | Typically saves 10–30% of lighting energy in daylit areas | Track circuit energy during comparable sunny and cloudy periods | Set the daylight threshold to maintain safe visibility and avoid noticeable flicker |
| 4 | Add timers or scheduled controls | Lighting is left on after closing time or outside normal occupancy | Schedule automatic shutoff for corridors, storage areas, and other predictable-use spaces | A 1-hour daily reduction saves about 2.9 kWh per 8 W fixture each year | Review the schedule monthly and compare it with actual occupancy records | Provide a manual override where emergency access or cleaning requires additional lighting |
| 5 | Use dimming instead of full output when appropriate | Downlights operate at 100% output for every task | Set lower light levels for circulation areas and use task lighting where higher brightness is needed | A 20% reduction in operating power can save about 5.8 kWh per 8 W fixture each year | Record dimmer settings and compare circuit consumption before and after adjustment | Use compatible dimmable lamps, drivers, and controls to avoid flicker or premature failure |
| 6 | Clean trims, lenses, and surrounding surfaces | Dust reduces useful light output, encouraging higher brightness or longer operation | Clean accessible surfaces during routine maintenance, typically every 6–12 months | Energy savings vary; cleaning helps preserve designed light output without increasing power | Measure illuminance at the same locations before and after cleaning using a calibrated light meter | Switch off and allow fittings to cool before cleaning; do not use liquids inside electrical parts |
| 7 | Check for overheating and blocked ventilation | Insulation, dust, or enclosed fittings can increase operating temperature | Keep the fitting within its approved installation conditions and maintain required clearances | Prevents premature replacement and maintains rated efficiency; savings depend on the fault | Inspect for discoloration, heat damage, flicker, repeated driver failure, or unexpected shutdowns | Follow local electrical regulations and the fitting manufacturer’s clearance requirements |
| 8 | Group lights into controllable zones | All downlights in a large area operate together, even when only part of the area is used | Control perimeter, task, and circulation zones independently | Often reduces operating hours by 10–25% in partially occupied spaces | Use circuit-level submeters or smart control logs to compare each zone’s runtime | Confirm that switching zones does not create glare, dark spots, or inadequate emergency lighting |
| 9 | Replace failed units with the correct light output, not simply the highest wattage | A failed fitting is replaced with a higher-power model without checking lumens or beam angle | Compare lumens, beam spread, color quality, lifetime, and wattage before replacement | Avoids unnecessary load increases; a 2 W reduction saves about 5.8 kWh per fixture each year | Maintain an asset register with location, wattage, replacement date, and observed faults | Verify cut-out size, insulation rating, fire requirements, and electrical compatibility |
| 10 | Measure and review lighting energy regularly | Energy use is estimated from invoices or lamp ratings alone | Track lighting circuits with a suitable submeter, power logger, or building energy-management system | Enables verified savings and identifies abnormal loads or excessive runtime | Record kWh, operating hours, fixture count, faults, and maintenance dates at least monthly | Compare similar periods and account for occupancy, daylight, holidays, and changes in electricity rates |
Reference assumptions: Annual estimates use 4 operating hours per day and 365 days per year. A 50 W lamp uses 73.0 kWh per year, while an 8 W LED uses 11.68 kWh per year. Results are shown per fixture unless noted otherwise.
Calculation: Annual energy use (kWh) = wattage (W) × operating hours per day × operating days per year ÷ 1,000. Multiply the result by the number of fixtures to estimate total lighting energy use.
It produces useful brightness with less electricity. Compare delivered lumens and lumens per watt, not wattage alone. Good optics direct light onto work surfaces. That matters.
Poor ventilation traps heat and reduces LED performance over time. Aluminium heat sinks move heat away from sensitive components. Stable drivers can reduce flicker and electrical losses. Not always.
Check the complete wattage, including the driver. Use about 90 lumens per watt as a practical screening point. Review lifetime testing, warranty details, and safety certification. Labels can mislead.
Choose 2700–3000 K for bedrooms and 3500–4000 K for work areas. A warmer tone may feel comfortable at lower brightness. Personal preference still matters.
CRI shows how naturally the light displays colors. Choose CRI 90 or higher for artwork, food, and skin tones. Lower CRI may look acceptable, but colors can appear dull.
Occupancy sensors switch lights off in empty rooms. Dimmers reduce output near windows or during evening use. Confirm compatibility before purchase. Dimmable does not mean universally compatible.
A 36-degree beam creates focused pools of light. Wider beams soften shadows and spread illumination more evenly. Choose the beam for the task, not appearance alone.
Measure the room before installing multiple fittings. Lights placed too closely create harsh bright patches and waste energy. Recheck the layout at night. Fewer fittings might work.
Dust on trims and lenses gradually reduces usable light. Clean them carefully during routine inspections. Replace failed drivers when practical. I once underestimated layout needs during renovation.
Reducing lighting energy use starts with understanding what makes downlights efficient. LED downlights generally consume less electricity, produce less heat, and last longer than older lighting technologies. When choosing low-consumption models, compare wattage, brightness, beam angle, color temperature, and energy performance to ensure the fixture delivers suitable illumination without unnecessary power use. Proper placement also matters: position downlights to spread light evenly across work areas, hallways, and living spaces, reducing the need for extra fixtures or excessive brightness.
To understand how to reduce energy consumption with downlights, use dimmers, timers, motion sensors, or smart controls to match lighting levels with actual needs. Turn lights off automatically in unoccupied areas and create schedules for predictable routines. Regular maintenance, including cleaning dust from trims and checking connections, helps preserve brightness and efficiency. Finally, track usage through smart meters or energy-monitoring tools so you can identify waste, adjust settings, and measure the results of your lighting improvements over time.

Diva Lights